

When a chargeback notice from Chase lands in your inbox, it's easy to feel a jolt of panic. But trust me, the best thing you can do is take a deep breath and respond calmly, quickly, and with a solid plan. To dispute a credit card charge with Chase effectively, you need to first acknowledge the dispute, dig into the details, and immediately start pulling your evidence together.
Think of it this way: acting with speed and a methodical approach is the foundation of a successful defense.
Your First Steps in a Chase Charge Dispute

The moment that Chase dispute notification arrives, the clock officially starts ticking. For many Shopify or PayPal sellers, this is where the stress kicks in, but it doesn't have to be that way. Instead of seeing it as a crisis, think of it as the first step in a clear, manageable process. Your goal here is to transform a potentially messy situation into a structured defense.
The very first thing to do? Stop and actually read the notice. Don't just skim the email. Log in to your merchant portal, open the case, and get a firm grasp on what the customer is actually claiming. Chase will provide a reason code, which is your starting point for figuring out what, from the cardholder's perspective, went wrong.
Organizing Your Initial Response
Once you know the why behind the dispute, your next move is all about organization. This isn’t just about winning a single case; it's about building a system that makes every future dispute less of a headache. I always recommend starting a dedicated digital folder for each specific case number.
Here's what you should focus on right away:
- Spot the Deadline: Find the final date to submit your evidence. This is non-negotiable. Missing it means an automatic loss, so get it on your calendar immediately. Chase usually gives merchants a pretty tight window to respond.
- Review the Transaction: Pull up the original order in your system. Look at the customer's name, the items they bought, the shipping address, and the total amount. Does anything jump out as unusual or suspicious?
- Gather Initial Evidence: Start collecting the low-hanging fruit. This includes the order confirmation email, all shipping and tracking information, and any direct communication you had with the customer before or after the purchase.
By dedicating the first hour after a notification to pure organization and evidence gathering, you dramatically increase your chances of building a compelling case. A rushed response is almost always an incomplete and weaker one.
This initial prep work is everything. It's like setting up your pieces on a chessboard before you even think about making your first move. Having all your documents in one place ensures you can build a strong, clear narrative that directly counters the customer's claim.
To give you a better sense of how these first actions fit into the bigger picture, you can learn more about the complete card dispute process and see how these crucial first steps lay the groundwork for everything that follows.
When a Chase chargeback notification arrives, a quick, organized reaction is your best defense. This checklist breaks down the most critical first moves to make.
Immediate Merchant Checklist for Chase Disputes
Following this checklist doesn't just help you get organized; it puts you in a proactive position to build a strong, evidence-based rebuttal from the very start.
Getting to the Bottom of Why the Chargeback Happened
Before you can even think about putting together a dispute with Chase, you have to put on your detective hat. Every single chargeback comes with a reason code, which is basically the bank's shorthand for why their customer is unhappy. But let's be honest, these codes are often frustratingly vague, boiling down to big, unhelpful categories like "Fraud" or "Product Not Received."
Your first job is to see past that generic label and figure out what really happened. Was it a legitimate stolen credit card used on your site? Or did a package get swiped off the customer's porch right after your tracking confirmed it was delivered? These are two wildly different situations, and they demand completely different kinds of proof to win.
Decoding the Real Reason
Think of the reason code as a clue, not the full story. A "Transaction Not Recognized" dispute, for example, could absolutely be true fraud. But more often than not, it just means the customer didn't recognize your store's name on their statement or completely forgot about that subscription they signed up for months ago.
Another common headache is the "Product Not Received" claim. This could be a genuine shipping mistake on your part, a delay caused by the carrier, or, unfortunately, a customer trying to get a freebie. Nailing down the most likely cause is the single most important step you can take. It creates a roadmap for the exact evidence you need to gather.
A winning dispute isn't just about proving a sale happened. It’s about directly knocking down the specific claim the cardholder made. Knowing the why is everything.
The Growing Problem of "Friendly Fraud"
One of the trickiest situations you'll run into is something the industry calls "friendly fraud." This has nothing to do with stolen cards. It happens when a real customer disputes a purchase they actually made. It could be a case of buyer's remorse, confusion, or sometimes, they're intentionally gaming the system.
This kind of chargeback abuse is a massive and growing problem. In fact, some reports show that an eye-watering up to 75% of all chargebacks might be friendly fraud—customers disputing valid charges because it's easier than asking for a refund. The trend is only getting worse now that consumers can fire off a dispute with a few taps in their banking app. You can get more details on this in the 2025 Cardholder Dispute Index.
Understanding this helps you approach certain disputes with the right frame of mind. If you smell friendly fraud, your evidence needs to prove the customer fully intended to buy and that you delivered exactly what they ordered. That's a very different strategy than just proving a box was left on a doorstep.
Common Chargeback Scenarios
To help you connect the dots, let's walk through a few real-world examples that show you what's really going on behind the official reason codes.
Scenario A: The Family Purchase. A customer files a fraud dispute for an online gaming purchase. You do a quick check and see the shipping address and the IP address used for the purchase match all their past orders. It’s almost certain a child or another family member made the purchase without asking. Classic friendly fraud.
Scenario B: The Vague Descriptor. Your company's legal name is "Global Wares Inc.," but your billing descriptor on credit card statements is "GW-Online." A customer who bought a gift three months ago sees "GW-Online," doesn't recognize it, and disputes the charge. The problem here isn't fraud; it's a confusing descriptor.
Scenario C: The Delivery Dispute. A customer claims their package never arrived. You pull up the UPS tracking, and it clearly states "left at the front door" with a timestamp. This is a classic delivery dispute where your evidence has to prove the carrier delivered the item to the correct address as promised.
Getting familiar with the different reasons for a chargeback gives you a huge advantage. When you can correctly diagnose the problem from the start, you set yourself up to gather the right evidence and build a much, much stronger case.
Gathering Compelling Evidence to Win Your Case
A strong dispute response is built on a foundation of solid evidence. This is where you shift from defense to offense. Building a compelling case isn't about dumping every file you have on Chase—it's about telling a clear, logical story backed by proof. Forget the generic advice; let's talk about the specific documents that actually get disputes overturned.
Your goal is to package your evidence so it's so organized and persuasive that the reviewer has no choice but to see the transaction from your perspective. It needs to directly challenge whatever the cardholder is claiming, whether that's fraud, an item not received, or a product not as described.
The infographic below gives you a simple decision tree to help you understand the core of a dispute right from the get-go.
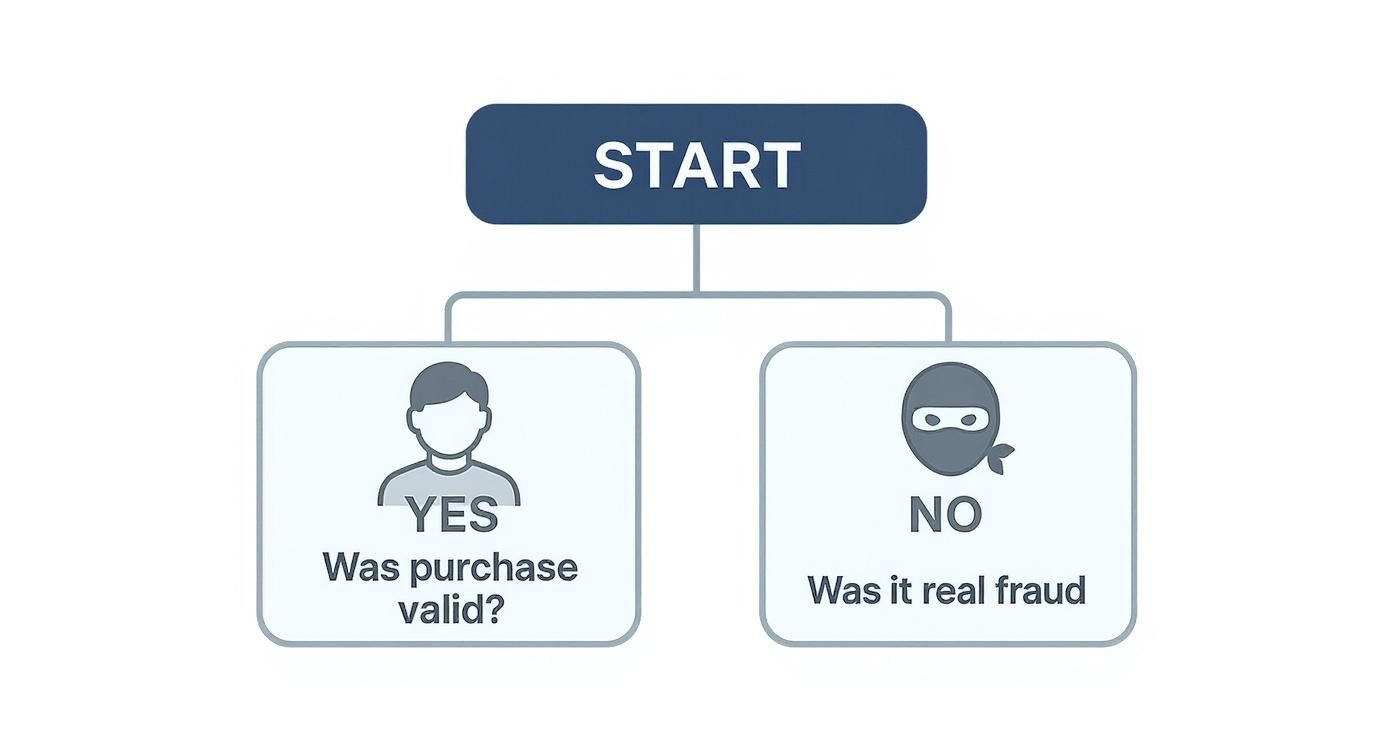
As you can see, once a purchase is confirmed as valid, the dispute often falls into that tricky "friendly fraud" category, which demands a very specific evidence strategy.
Essential Documents for Every Dispute
No matter the reason code, some pieces of evidence are non-negotiable. Think of these as the bedrock of your case file. I always start by gathering these core documents before digging into anything more specific.
- The Original Order Invoice: This is your foundational proof. It shows exactly what the customer purchased, the price they agreed to, and both the billing and shipping addresses.
- Proof of Communication: Grab screenshots of any emails, support tickets, or chat logs you've had with the customer. This can show them asking about a product before buying, confirming their address, or even praising the item after delivery.
- Terms of Service and Refund Policy: You'll want a screenshot of the policies the customer agreed to at checkout. This is absolutely critical for disputes related to returns or subscription cancellations.
A well-organized case file tells a story. The reviewer should be able to look at your evidence and understand the entire customer journey from purchase to delivery without having to guess.
Once you have these basics nailed down, it's time to tailor your evidence to the specific claim. The proof you need for a fraud claim is worlds apart from what you'd submit for a "product not received" dispute.
Tailoring Evidence to the Claim
Let's break down what you need for the most common scenarios. Mismatching your evidence to the claim is one of the fastest ways to lose a dispute, so pay close attention here.
For "Fraud" or "Transaction Not Recognized" Claims
When a customer claims they didn't authorize the purchase, your job is to connect them directly to that order.
- AVS and CVV Match Results: Show that the Address Verification System (AVS) and Card Verification Value (CVV) checks came back as a match. This is strong evidence that the legitimate cardholder made the purchase.
- IP Address Geolocation: Provide a screenshot showing the IP address used for the purchase matches the customer's billing or shipping city.
- Previous Order History: Is this a repeat customer? If so, include a list of their past successful orders sent to the same address. That's a huge red flag for friendly fraud.
For "Item Not Received" Claims
Here, it's all about proving delivery. Your evidence needs to be crystal clear.
- Tracking Number and Delivery Confirmation: Don't just list the number. Give them a direct link to the carrier's tracking page that shows the "Delivered" status, along with the date, time, and full address.
- Photo of Delivery (if available): Many carriers now provide a photo of the package at the customer's doorstep. In my experience, this is incredibly powerful proof.
- Signed Delivery Confirmation: If a signature was required, this is the best evidence you can possibly provide. Game over.
Winning isn't just about having evidence; it's about presenting the right evidence clearly. To get a deeper dive into crafting your narrative, check out our guide on how to win a credit card dispute. Each piece of proof should act as a chapter in your story, leading the bank to a logical conclusion—one that's in your favor.
How to Submit Your Response to Chase
You’ve done the legwork and gathered all your evidence. Now it’s time to actually present it to Chase. Think of this as building your final case file. It's not just about dumping a folder of documents on their desk; you need to tell a clear, compelling story that guides the reviewer to the only logical conclusion: siding with you.
The submission process itself is pretty straightforward, but how you package your response can be the difference between winning and losing. Your job is to make it dead simple for the person at Chase to see things your way.
Choosing Your Submission Method
For most Shopify and PayPal sellers, the quickest and most reliable way to respond is directly through your Chase merchant portal. Once you log in, you'll find a section for open disputes. This is where you can upload your evidence and add comments for each specific case. I always recommend this method because it instantly ties your proof to the correct dispute record, leaving no room for error.
Occasionally, you might get instructions to respond via fax or mail, though thankfully, that’s becoming a thing of the past. If you absolutely have to go this route, make sure every single page you send has the case number on it. Seriously. You don't want your crucial evidence getting lost in a paper shuffle.
Your rebuttal letter is the cover story for your evidence. It should be a concise, professional summary that connects the dots for the Chase reviewer, explaining what each piece of evidence proves.
A well-crafted rebuttal letter is your secret weapon here. This isn't just a quick note; it's a professional document that introduces your case and gives the reviewer a roadmap to the evidence you’ve attached. It needs to state the dispute reason and clearly explain how your proof shuts down the customer's claim. To see what a powerful one looks like, check out this example of a rebuttal letter for some inspiration.
Don't Miss the Deadline
This is the golden rule, and it’s non-negotiable: you cannot miss the deadline. The second a chargeback is filed, a timer starts. While cardholders get a generous window (often up to 60 days) to file a dispute, merchants are on a much tighter leash—sometimes as short as five days—to get their response in.
If you miss that deadline, it’s an automatic loss. It doesn’t matter if you have an ironclad case with video proof of the delivery. The deadline is everything.
Presenting Your Case for Success
When you’re ready to upload everything, organize your files logically. Don't be the person who uploads ten files named "screenshot1.png," "proof.pdf," and "final.jpg." That just creates confusion.
Instead, I tell my clients to use a simple and consistent naming system. It looks clean and professional.
- 01_Rebuttal_Letter.pdf
- 02_Customer_Invoice.pdf
- 03_Shipping_Confirmation.pdf
- 04_Email_Correspondence.png
This tiny organizational step does wonders. It shows you're on top of your game and makes the reviewer's job incredibly easy. A clean, well-presented case is always more persuasive than a disorganized data dump. Taking a few extra minutes to structure your response like this can genuinely boost your chances of winning.
The True Cost of a Chase Chargeback

So, you’ve lost a Chase chargeback. The initial sting is losing the sale amount, which feels bad enough. But if you think that’s where the damage ends, you’re in for a surprise. The real pain comes from all the hidden costs that start stacking up immediately after.
On top of seeing that revenue vanish, Chase—like every other processor—will hit you with a non-refundable chargeback fee. This happens for every single dispute filed against you, whether you win or lose.
These fees add up fast, and a single dispute can quickly erase your profit margin. When you factor in the lost sale, the fee, and the time you spent dealing with it, the total cost of one chargeback can easily land somewhere between $20 and $100.
Your Chargeback Ratio Explained
Beyond the immediate financial hit, every dispute chips away at a critical metric for your business: your chargeback ratio. Think of it as a health score for your merchant account.
Card networks like Visa and Mastercard are watching this number like a hawk. It’s a simple calculation—your total chargebacks for the month divided by your total transactions. If that number starts to creep up, you’re heading into dangerous territory.
Generally, a ratio above 0.9% is a massive red flag for processors. Once you cross that line, a domino effect of penalties can kick in:
- Higher Processing Fees: Banks now see you as a bigger risk, so they'll start charging you more for every single transaction you process.
- Account Scrutiny: Chase might put a reserve on your account, holding back a percentage of your funds to cover their potential losses from future disputes.
- Account Termination: This is the worst-case scenario. If your ratio stays high, Chase can shut down your merchant account completely, leaving you unable to accept credit card payments.
Understanding your chargeback ratio isn’t just about crunching numbers; it’s about safeguarding the future of your business. One bad month of unchecked disputes can create financial headaches that last for a long, long time.
This is exactly why knowing how to properly dispute a charge with Chase is non-negotiable. Every illegitimate claim you successfully fight is a win for your bottom line and helps keep your ratio in a healthy range. The financial fallout from chargebacks is serious, and it’s always a good idea to brush up on understanding credit card interest and its implications to see the full picture of how these issues compound.
Common Questions About Chase Chargebacks
Even with the best preparation, dealing with a Chase chargeback can leave you with a few nagging questions. I get it. Let’s run through some of the most common ones that pop up for merchants so you can clear up any confusion.
How Long Does a Chase Investigation Take?
Once you’ve fired off your evidence, the waiting game begins. A Chase chargeback investigation usually takes somewhere between 30 and 90 days to wrap up.
The final timeline really depends on the complexity of the case and how quickly the customer’s bank gets back to Chase. There's not much you can do to speed it up, so the best you can do is sit tight. Chase will let you know the final verdict once it's all over.
Should I Contact the Customer Directly?
Absolutely. In fact, it should be your first move. A quick, polite email or phone call can often clear up a simple misunderstanding in minutes. More often than not, the customer just forgot about the purchase or mixed up your store with another one.
If you manage to sort it out and they agree to drop the dispute, make sure you get that in writing. A simple email confirmation is perfect. You'll want to include a screenshot of that conversation in the evidence you submit to Chase. It’s a powerful piece of proof.
What Happens If I Lose the Dispute?
If the decision doesn’t fall in your favor, the funds are gone for good—they go right back to the cardholder. Not only do you lose the sale, but you're also out the non-refundable chargeback fee. For most e-commerce sales, this is pretty much the end of the line.
There is one exception for very high-value items, where you could technically pursue arbitration through the card network (like Visa or Mastercard). But honestly, this is a costly and complicated legal headache that just isn’t practical for the vast majority of online disputes.
Why Do Most Merchants Lose Disputes?
Here's the hard truth: most merchants don't lose because their case is weak. They lose because their evidence is weak. A lot of disputes are lost simply because the proof submitted was disorganized, incomplete, or didn't directly shut down the customer's specific claim.
Just saying "the charge is valid" won't get you anywhere. You have to build an airtight case that leaves no room for doubt.
- Fighting an "Item Not Received" claim? You need more than just a tracking number. Show a delivery confirmation with the full address, date, and time. A photo of the package on their porch is even better.
- Fighting a "Fraud" claim? You need to connect the dots. Show that you have AVS/CVV matches, IP geolocation data that matches their location, and maybe even a history of past successful orders from them.
Winning a dispute with Chase really boils down to how well you can present a clear, undeniable, and well-documented case.
Tired of the manual grind of fighting chargebacks and watching your revenue disappear? ChargePay uses AI to handle the entire dispute process for you, crafting winning responses in real-time. Stop losing money and start recovering up to 80% of your chargebacks, completely hands-free. Check it out at https://www.chargepay.ai.


.svg)


.svg)
.svg)
.svg)