
It’s a feeling every merchant knows and dreads: the notification that a customer has filed a dispute. Suddenly, a chunk of your revenue is frozen, and you’re on the clock to resolve it. While many of these issues can be sorted out directly with the customer, knowing exactly when and how to escalate a case on PayPal is a non-negotiable skill for protecting your business.
Escalating a case means you’re officially asking PayPal to step in, review the evidence, and make the final call.
Knowing When to Escalate a PayPal Case

Hitting that "escalate" button isn't always the right first move. I've seen countless disputes that were simple misunderstandings, fixed with a quick, professional message. That approach saves the sale and often the customer relationship.
But some situations absolutely demand that you bring in PayPal as the referee.
The trick is to read the room. Is the buyer just ghosting you after you’ve offered a perfectly reasonable solution? That's a huge red flag. Have you provided tracking that clearly shows the package was delivered, but they’re still claiming it never arrived? It's time to stop negotiating and start escalating.
Clear Signs It's Time to Act
Spotting the right moment to escalate is part gut feeling, part experience. You're looking for signs that direct communication is breaking down or that the buyer might not be acting in good faith.
Here are a few classic scenarios where escalating is your best move:
- The Unresponsive Buyer: You’ve replied to their dispute right away with proof and a proposed solution. Days go by. Crickets.
- Obvious Friendly Fraud: The customer’s claim just doesn't add up. Maybe they say an item is “not as described” but refuse to send a single photo. This is one of the most common reasons for chargebacks, and it often signals a fraudulent claim.
- You've Hit a Dead End: The conversation is just going in circles. You've sent proof, you've reiterated your return policy, and the buyer simply refuses to cooperate.
Timing is everything. Escalate too quickly on a simple mix-up, and you risk alienating a good customer. But wait too long on a bogus claim, and you’re just wasting time and money. Learning to spot the difference is a critical skill for any e-commerce merchant.
It's also important to remember the hard deadlines PayPal has in place. Buyers have a strict 180-day window from the transaction date to file a dispute for things like unauthorized transactions, and this timeline can’t be extended. This 180-day limit basically sets the entire lifecycle for a dispute, underscoring why you need to be on top of your game from day one. You can find more stats on PayPal dispute timelines on sqmagazine.co.uk.
Building a Winning Case Before You Escalate
Before you even think about hitting that escalate button, you need to arm yourself with evidence. It's a common mistake to think you can just tell PayPal your side of the story and win. The reality is, you have to show them. A well-prepared case is a winning case, and it all boils down to gathering proof so compelling it leaves no room for doubt.
Think of yourself as a detective building a file on the transaction. Every single piece of evidence strengthens your position and makes it much easier for the PayPal review team to see things your way. Rushing this step is probably the single biggest reason merchants lose disputes they should have won.
Gathering the Right Kind of Proof
So, what evidence actually matters? It really depends on the type of dispute you’re up against. A claim for an "Item Not Received" (INR) needs a completely different set of documents than a claim for "Significantly Not as Described" (SNAD).
Let's break down what you need for the most common scenarios.
Essential Evidence Checklist for PayPal Escalations
Here’s a quick-reference guide to the types of evidence you should be gathering for the most common PayPal dispute types. Having these ready will make the process much smoother.
Getting these documents in order before you even respond is the key to building a strong foundation for your case.
Item Not Received Disputes
For Item Not Received disputes, your absolute best weapon is undeniable proof of shipment and, most importantly, delivery.
- Valid Tracking Information: A tracking number is just the start. You need one that clearly shows a "Delivered" status from a reputable carrier, and it must be addressed to the exact location the buyer provided in the transaction details. No exceptions.
- Shipping Receipts: This is your proof of origin—the original receipt from the post office or courier that confirms you actually sent a package to the buyer's address.
- Proof of Delivery Signature: If you're selling a high-value item, signature confirmation is your golden ticket. It's nearly impossible for a buyer to claim they never got something they personally signed for.
Significantly Not as Described Disputes
When you're dealing with a Significantly Not as Described claim, the game changes. Now, your goal is to prove the item was exactly what you advertised.
- Original Product Listing: Screenshots of the product page from the time of purchase are non-negotiable. This shows the exact photos, description, and specifications the customer saw and agreed to.
- Customer Communications: Document every single message. If the customer was initially happy or if their current complaint contradicts something they said earlier, those conversations are incredibly powerful.
- Photos of the Shipped Item: Do you take pictures of items before packing them? For custom or expensive products, this can be a lifesaver, directly countering claims that you sent something damaged or incorrect.
Remember, the person reviewing your case at PayPal knows nothing about your business or this specific transaction. Your goal is to hand them a crystal-clear, factual story backed by undeniable proof. Make their decision easy.
A strong evidence package often includes a well-written rebuttal letter that ties all your proof together into a coherent argument. If you're not sure where to start, you can check out some helpful rebuttal letter examples to see how to frame your case effectively.
Finally, don’t overlook your store policies. Clear screenshots of your return policy, shipping terms, and any terms of service that were visible when the customer checked out can be surprisingly persuasive. They show you were upfront from the very beginning. By meticulously pulling these items together, you’re not just responding to a dispute—you’re building an airtight case before you even have to escalate.
How to Navigate the PayPal Resolution Center
The PayPal Resolution Center is command central for any dispute, but let's be honest—it can feel like a maze the first time you use it. Think of this as your guided tour to help you move through the process with confidence, from finding your case to officially asking PayPal to step in.
Once a dispute is open, it will live in your Resolution Center. This is where you'll see all communication, upload your evidence, and eventually, escalate the case to a claim. Don't let the interface intimidate you; it's more straightforward than it looks once you know where to click.
Finding Your Case and Taking Action
When you log into your PayPal account, you can get to the Resolution Center directly from your main dashboard or account summary. All your open cases will be listed right there, each with a status update so you know where things stand.
This is your first checkpoint. Find the specific case you need to deal with. You'll see a button or link, usually labeled "View" or "Respond," which takes you into the case details. This is where you can review everything the buyer has submitted and see the full communication history.
When you’re ready to escalate, look for a button that says something like “Escalate this dispute to a PayPal claim.” It's typically near the bottom of the page. Clicking this is the official trigger that tells PayPal, "Okay, I need you to step in and make the final call."
Just be sure you've uploaded all the evidence we talked about earlier before you click that button. Once you escalate, you're handing the reins over to PayPal’s review team. You want them to have a complete, compelling file to work with from the get-go.
Understanding Case Statuses
As your case moves through the system, its status will change. Knowing what these mean helps you understand what's happening and what, if anything, is expected of you next.
- Under Review: This means PayPal has the info and their team is actively looking into the claim. There’s nothing for you to do but wait.
- Awaiting Other Party’s Response: The ball is in the buyer’s court. PayPal is waiting for them to provide information or respond to the evidence you sent over.
- Needs Your Response: This one is urgent. It means PayPal needs more information from you. Act on this immediately to avoid having the case automatically closed against you.
Keeping an eye on these statuses is crucial. For a deeper dive into how the system works, you can learn more about the PayPal dispute resolution centre in our article.
Here’s a simple breakdown of the evidence you should have ready to go. Having these things organized makes navigating the Resolution Center much more effective.
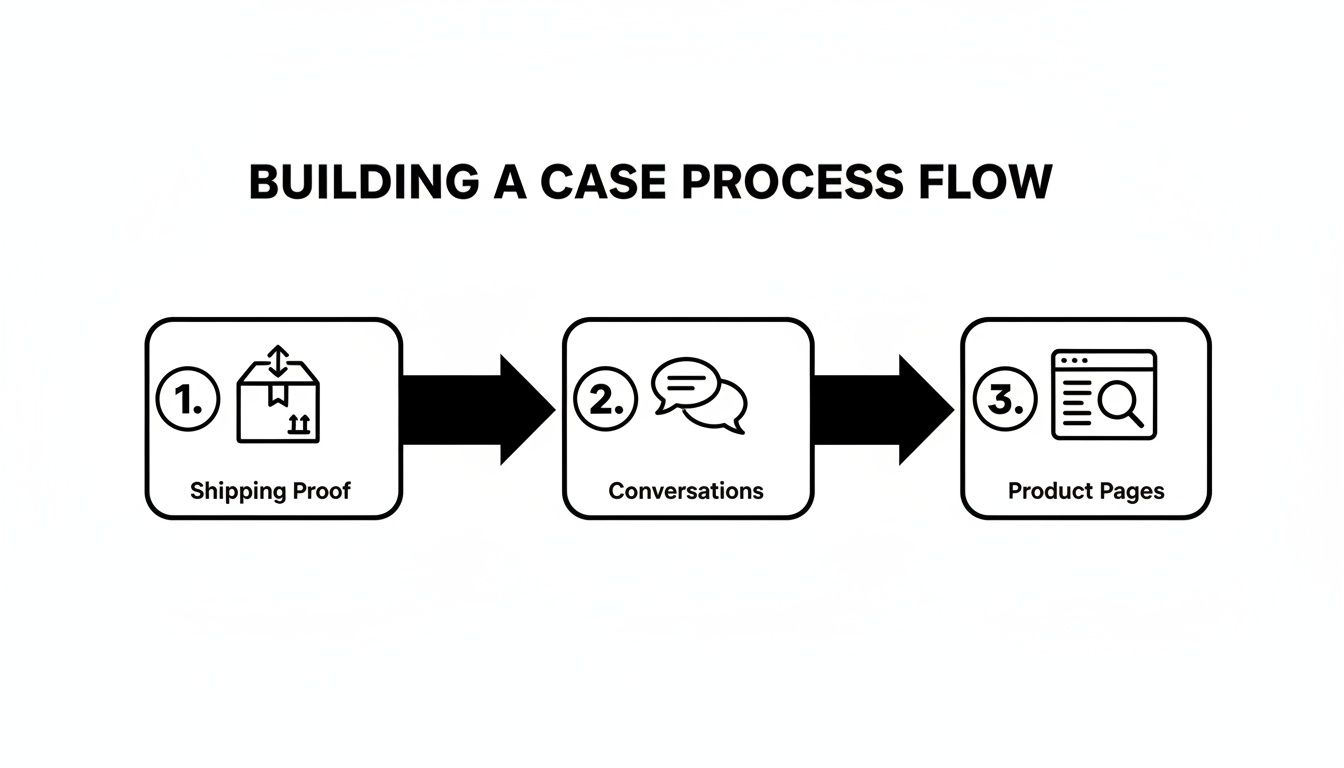
This process flow shows the core pillars of a solid case: having your shipping proof locked down, documenting all conversations, and keeping good records of your product pages.
Writing a Powerful Escalation Message
When you escalate, you’ll often get a small text box to add a final message. This is your chance to write a short, powerful summary for the PayPal reviewer who will decide the outcome.
Don't write a novel. Be direct and factual.
Here’s an example that works:
"Escalating this 'Item Not Received' case. As uploaded, the tracking number (12345XYZ) confirms delivery to the buyer's address on [Date]. Please see the attached proof of delivery from the carrier. The buyer's claim is inconsistent with the evidence provided. Thank you."
This message does three things perfectly: it states the issue, points directly to the key evidence you've already provided, and stays professional. That’s exactly what a reviewer needs to make a quick, informed decision in your favor.
What Happens After You Escalate a Case
You’ve gathered your evidence, built your case, and officially asked PayPal to step in. So, what now? This is where the waiting game begins, and it can be a little nerve-wracking not knowing what's happening behind the scenes. But don't worry, the process is more straightforward than you might think.
Once you escalate a dispute, it becomes a formal claim. At this point, it’s out of your hands and goes to a dedicated PayPal investigation team. Think of them as an impartial judge. Their entire job is to sift through all the information—everything from you and the buyer—to make a final call.
And they don't just glance at it. They meticulously review everything: your tracking information, the customer messages you uploaded, the buyer's original complaint, and how it all stacks up against your product listing.
Understanding the Investigation Timeline
So, how long does this all take? The good news is that most PayPal claims get sorted out in less than 14 days. Of course, more tangled cases with a lot of conflicting evidence can sometimes stretch out to 30 days before you get a final decision.
Knowing this timeline is key to managing your own expectations. PayPal handles an almost unimaginable volume of transactions—we’re talking 6.2 billion in Q2 2025 alone—so their system is built to be efficient, but it still takes time. If you're curious, you can find more stats on PayPal's transaction volume on coinlaw.io.
Your main job during this period is to be patient but prepared. Resist the urge to bombard PayPal with messages asking for updates. Instead, trust the process and just keep an eye on your Resolution Center for any status changes.
You can check in on your case anytime by logging into the Resolution Center. The status will update from "Under Review" to reflect any new developments, so checking it every few days is a good way to stay in the loop without stressing yourself out.
Responding to Requests for More Information
Every now and then, the investigation team might hit a snag. Maybe they need you to clarify a specific piece of evidence, or they have a follow-up question. If that happens, you’ll get an email notification, and you'll see the case status change to “Needs Your Response.”
Pay attention, because this is a critical moment. You absolutely have to respond as quickly and thoroughly as you can. Any delay on your end could stall the investigation or, in a worst-case scenario, lead to PayPal closing the case in the buyer’s favor by default.
Here’s what you should do if they reach out:
- Read the request carefully. Make sure you understand exactly what they're asking for.
- Provide only the specific information they need—nothing more, nothing less. Don't muddy the waters.
- Upload any new documents directly through the Resolution Center.
Responding promptly shows you're cooperative and serious about resolving the issue. Remember, the easier you make the reviewer's job, the better your odds of getting a favorable outcome. For more tips on navigating these kinds of financial reversals, check out our guide on understanding PayPal chargebacks. Staying on top of every communication is the best way to keep your case moving toward a win.
Using Other Channels to Resolve Your Case
Sometimes, the Resolution Center just isn’t enough. You’ve submitted your evidence, followed the steps, but the outcome feels completely wrong. Or maybe the situation is just too complex to explain through a web form.
When the standard process hits a brick wall, knowing how to escalate your PayPal case through other channels is your next critical move. Don't assume the first "no" is the final answer. If you have a solid case and believe the decision was a mistake, you still have options.
This is where picking up the phone or filing a formal appeal can make all the difference.
Calling PayPal for Direct Support
Let's be clear: you can't get a decision reversed over the phone. But a real conversation can provide something just as valuable: clarity. A support agent can walk you through why the decision was made, what specific evidence they looked at, and what your options are for an appeal. This insight is gold.
Before you dial, get your ducks in a row:
- Have your Case ID ready. It’s the first thing they’ll ask for.
- Jot down your key points. Know exactly what you need to ask. Are you trying to understand the decision? Do you need the specific steps to file an appeal?
- Stay professional. We get it, it's frustrating. But venting at the agent won't help your cause. A calm, factual approach will get you much further.
If you have a PayPal business account, you might have access to dedicated seller support. This is often a better, more direct line to reps who actually understand the challenges merchants face.
How to Appeal a PayPal Decision
So, you lost the case. But what if you have new, game-changing evidence that wasn't submitted the first time? This is what the appeal process is for. PayPal gives you a chance to appeal a closed case, but you have to be quick and play by their rules.
You typically have just 10 days from the day the case was closed to file your appeal. And here's the most important rule: you must provide new information. Simply re-uploading the same documents is a guaranteed way to get your appeal rejected.
Think of an appeal as your one shot to present a crucial piece of the puzzle that was missing before. Maybe it's a delivery confirmation that finally updated, or an email from the buyer you just uncovered. This is the kind of new proof that can completely change the context of the case.
To get started, head back to the Resolution Center. Find the closed case and look for the appeal option. When you submit it, be crystal clear about what the new evidence is and exactly why it should overturn the original decision. Keep your message concise and focused entirely on the new proof. This is your final opportunity to make your case—make it count.
Automating Your PayPal Dispute Process
Let's be honest: manually handling every single PayPal case is a massive time sink, especially as your business grows. Digging through order histories for evidence and trying to keep track of tight deadlines isn't just inefficient—it's a surefire way to lose revenue. This is exactly where automation comes in to offer a much smarter path forward.
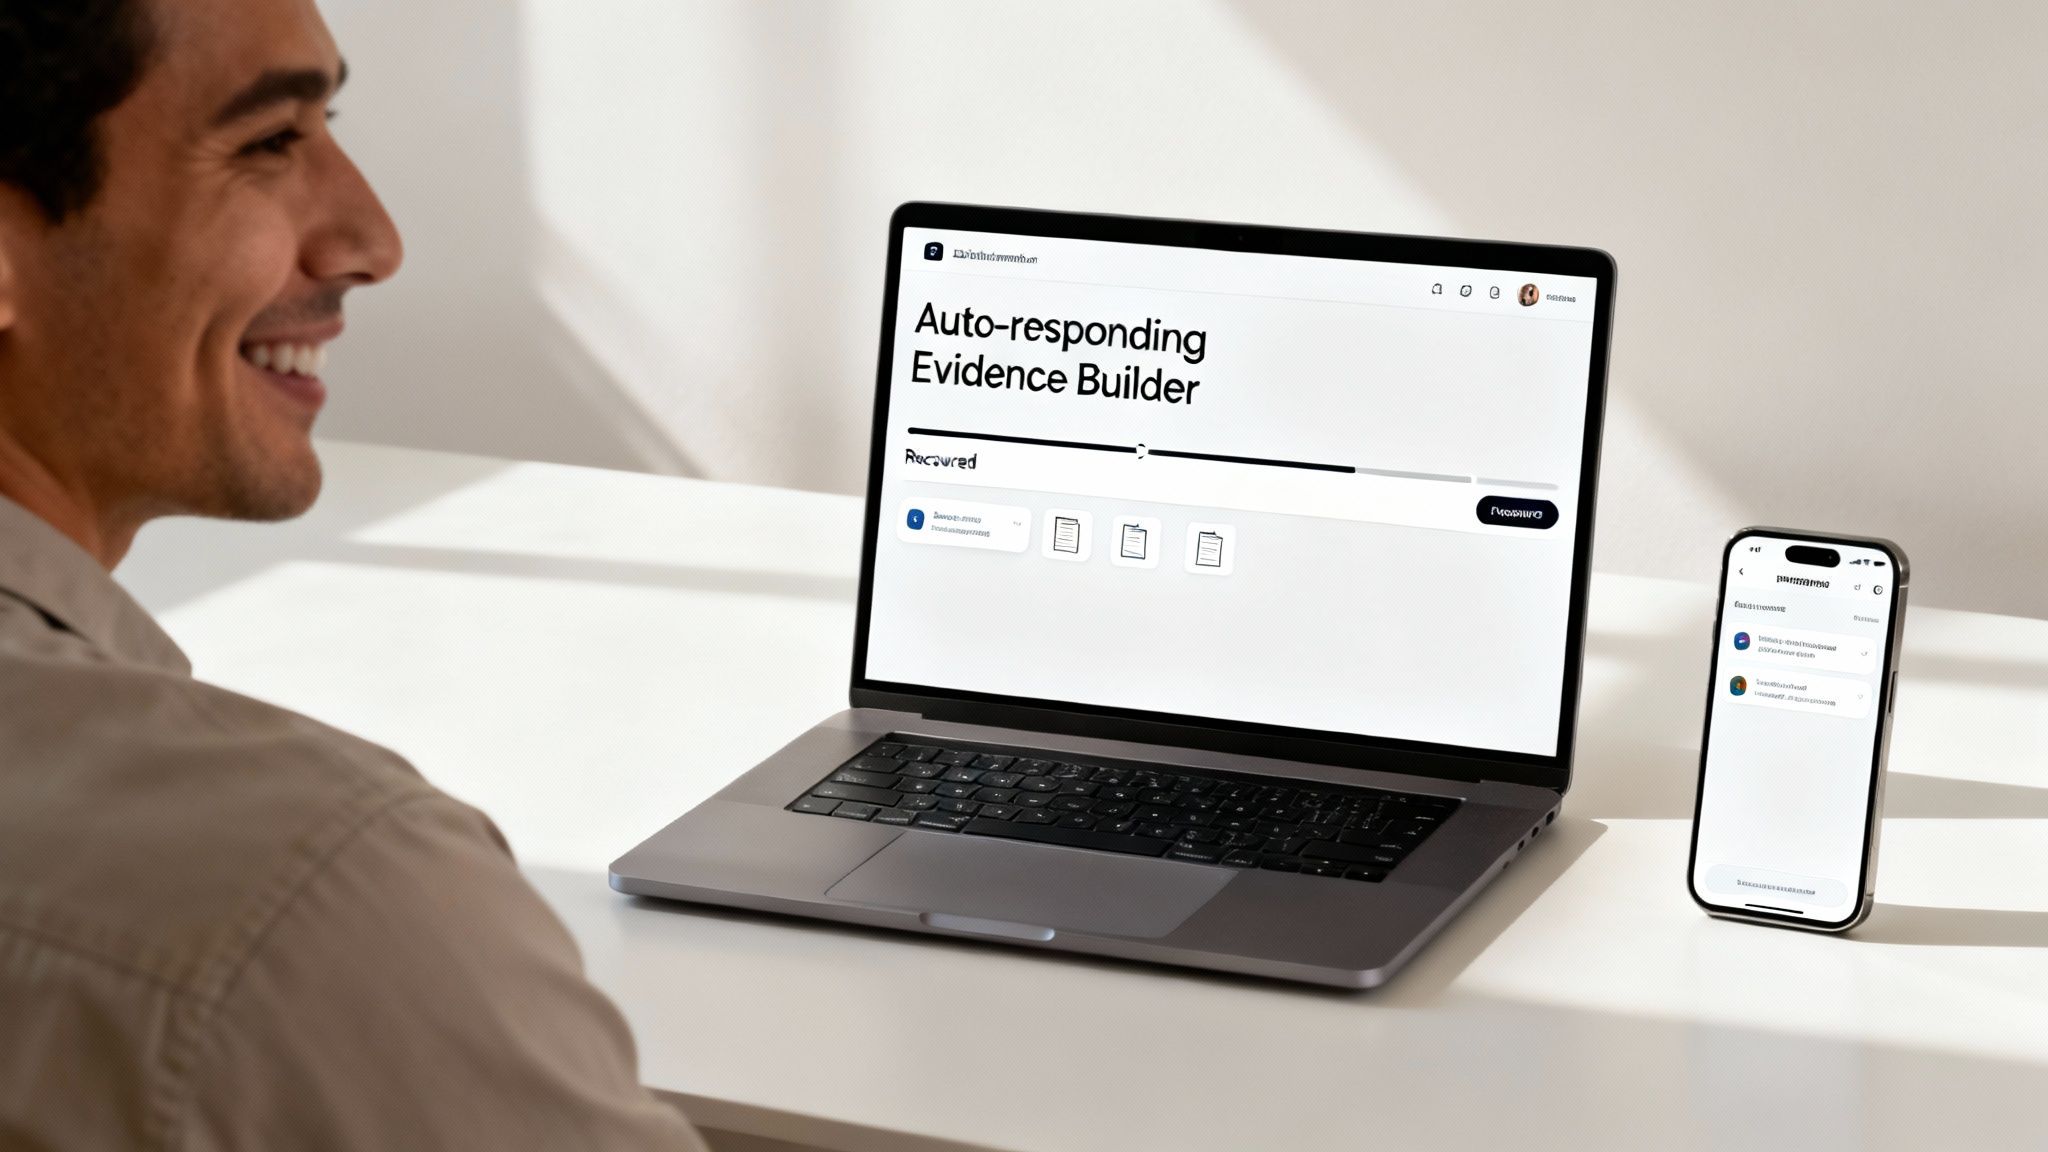
Imagine a system that does all the heavy lifting for you. Instead of you spending hours piecing together a defense, an AI-powered tool could generate a winning response the moment a dispute hits your account.
A Hands-Free Approach to Winning
Tools like ChargePay are built to completely overhaul how you manage disputes. The system plugs directly into PayPal, instantly analyzing each new case and pulling together all the necessary evidence to fight back effectively.
Taking this hands-free approach has some major upsides for any merchant:
- Better Win Rates: By using data-driven, perfectly formatted responses, merchants consistently see a big jump in their dispute win rates.
- Serious Revenue Recovery: Automation helps you reclaim money you might have otherwise written off as a simple cost of doing business.
- More Time in Your Day: When your team isn't bogged down in tedious manual tasks, they can get back to focusing on what actually grows your business.
This is about more than just convenience. It's about using smart technology to get better results and protect your bottom line without getting buried in endless paperwork.
Adopting automation is the ultimate step in mastering how to escalate a case on PayPal—by letting a smarter system handle the fight for you. You can dive deeper by reading our complete guide to automated chargeback and dispute management to learn more.
Quick Answers to Your Top PayPal Escalation Questions
Jumping into the PayPal escalation process can feel like you're trying to solve a puzzle. You’ve got questions, and you need straight answers. Here are some of the most common ones I hear from merchants who are figuring out how to escalate a PayPal case.
How Long Do I Have to Escalate a Case?
You get a 20-day window to escalate a dispute into a formal claim, starting from the moment the buyer first opens it. Think of this as a hard deadline.
If you don't act within those 20 days, the dispute automatically closes in the buyer's favor. Your chance to have PayPal step in and review the situation vanishes. The best practice? Keep a close eye on your Resolution Center so you never miss this critical timeframe.
What Happens If I Lose an Escalated PayPal Case?
If PayPal sides with the buyer, the money you’re fighting for is pulled from your account and sent back to them. To add insult to injury, you might also get hit with a separate dispute fee.
You can appeal the decision in some very specific scenarios, but there's a catch. You must have new and compelling evidence that you didn't include the first time around.
An appeal isn't a do-over. It’s your one shot to bring in game-changing proof that wasn't available to you before.
Can I Speak to Someone at PayPal About My Case?
Yes, you can absolutely get a human on the phone. Before you dial, make sure you have your case ID and all your transaction details handy.
While the agent on the other end can't just flip a decision on the spot, they can be incredibly helpful. They can often shed light on why a case was decided a certain way or walk you through the proper next steps, like how to file an appeal correctly.
Tired of losing revenue to confusing dispute processes? ChargePay automates the entire fight for you, using smart tech to build winning responses and get your money back without you lifting a finger. See how it works at ChargePay.ai.


.svg)


.svg)
.svg)
.svg)